
Create office 365 user with PowerShell
Install required software
These steps are required once on your computer, not every time you connect.
- Install the 64-bit version of the Microsoft Online Services Sign-in Assistant: Microsoft Online Services Sign-in Assistant for IT Professionals RTW.

- Open Power Shell as an Administrator

- Go to Start
- Search for Power Shell
- Right click on Windows Power Shell
- Run as Administrator
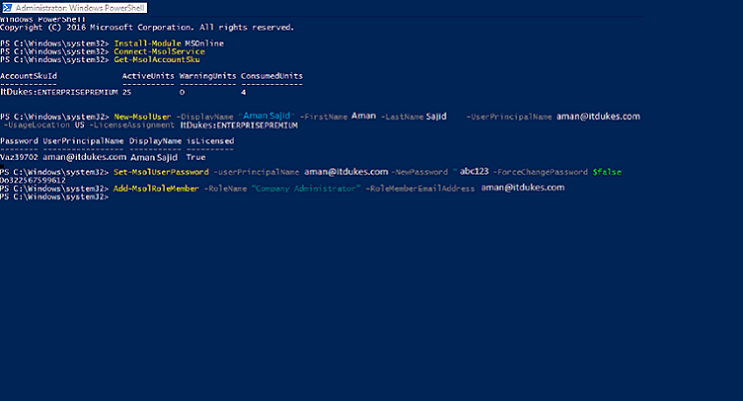
3. Run the following commands
Install-Module MSOnline
Connect-MsolService
4. To list the available licensing plan names, use the following command
Get-MsolAccountSku
5- Create an individual user account
New-MsolUser -DisplayName "Name of User" -UserPrincipalName user@yourdomain.com -UsageLocation US -LicenseAssignment "yourcompanyname:yourlicensename" -FirstName aman -LastName sajid
6. Set a password to the newly created user
Set-MsolUserPassword -userPrincipalName user@yourdomain.com -NewPassword “Abcd1234” -ForceChangePassword $false
7. Once the user is created assign a role to the user if needed
Add-MsolRoleMember -RoleName “Company Administrator” –RoleMemberEmailAddress user@yourdomain.com
If you want to assign an alias to Office 365 user
follow this Article Add or remove an email alias using Powershell


